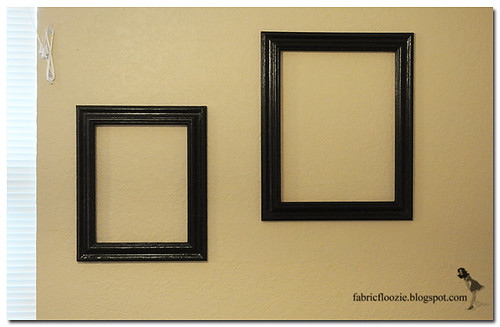
I finished the frames the other day, and just got around to hanging them and taking pics today. The photos aren't great b/c I really don't want to put holes in any more walls before we move out, so I used two existing nailholes that were already open (the photos have been packed up! YAY!) and close to one another. Asking for 2 existing nail holes within a few inches of each other AND having good natural light in that area is asking for quite a lot. LOL
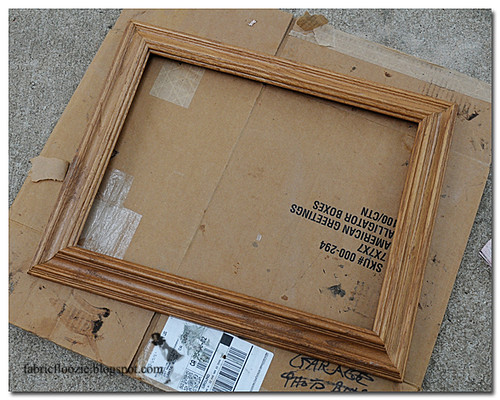
Befores:

Afters:

We used varnish stripper on the smaller of the two, before settling on paint instead of stain. then we used a primer called Cover Stain on both (one was stripped, one was not - it still had stain and poly on it) and followed with Black Semi-Gloss paint.
They will both get a coat of clear poly prior to actual use.


 My name is Jackie, and I'm a 25 year old pro photographer and SAHM to a 4.5 year old boy, and a 2 year old girl. We live in Texas and I enjoy many crafts such as crochet, knitting, digital scrapbooking, refinishing furniture and re-purposing.
Follow my blog to see what my latest projects are, and always feel free to drop me a line at
My name is Jackie, and I'm a 25 year old pro photographer and SAHM to a 4.5 year old boy, and a 2 year old girl. We live in Texas and I enjoy many crafts such as crochet, knitting, digital scrapbooking, refinishing furniture and re-purposing.
Follow my blog to see what my latest projects are, and always feel free to drop me a line at 


2 comments:
They look great! We have the same train of thought I tell ya. I am almost finished with my dining room table and my picture wall as well! Great minds..... ;)
Awesome! Your table looks wonderful!
Post a Comment