A while back, my mom & grandmother gave me some shirts to do with as i pleased. I've reconed them into lots of different outfits for Miss Lily, and today was no exception.
You see, I've been extremely busy lately with editing photoshoots/weddings, and trying to pack up the house for our move (only 2 more weeks!) I haven't even been able to touch my sewing machine in a good 2ish weeks, and even then, I was just sewing some little snap close bags to hold the items I made for a fair trade swap I participated in (check back soon to see what I get in return!).
In any event, today I was sufficiently caught up on editing, so I sat down to chop up this shirt, and make Lily a dress from it.
The style of it sort of evolved as I went.
In the end, it was a big of a bubble dress with 3/4 length sleeves.
I knew for sure I wanted to keep intact a few details of the shirt. I wanted to save the gathered neckline
and the outside of the sleeves, which was also gathered and gave it a bit of a puff :)
Aside from that, though, I just knew I wanted it to be a play dress.
While the fabric is cute, it is a little bland. So once I put it on her, it seemed a bit boring.
So I took the remaining hemline from the original shirt and added a fitted band to the bottom which slides up under the skirt to bubble it out.
Here you can see that panel
So about an hour to an hour and a half later, we have a new play dress for Miss Lily :)
Wednesday, April 29, 2009
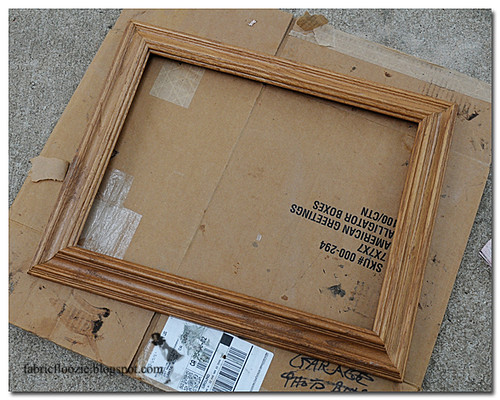
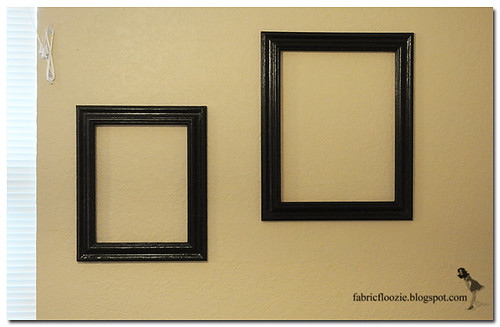
The finished frames
I finished the frames the other day, and just got around to hanging them and taking pics today. The photos aren't great b/c I really don't want to put holes in any more walls before we move out, so I used two existing nailholes that were already open (the photos have been packed up! YAY!) and close to one another. Asking for 2 existing nail holes within a few inches of each other AND having good natural light in that area is asking for quite a lot. LOL
Befores:
Afters:
We used varnish stripper on the smaller of the two, before settling on paint instead of stain. then we used a primer called Cover Stain on both (one was stripped, one was not - it still had stain and poly on it) and followed with Black Semi-Gloss paint.
They will both get a coat of clear poly prior to actual use.
Saturday, April 25, 2009
First New House Project
For the new house, we plan to refinish our dining room set to change it from a "blah" walnut color to a much darker "ebony". With that, I'm refinishing 2 pretty handmade frames from Mexico that my Dad gave me. Today I'm testing out the stripper and finish on one of the frames
(the black on the frame was a spraypaint that was *supposed* to be able to be used on previously painted/stained surfaces, but it didn't work for crap and just pooled on the gloss. Ugh.)
UPDATE: After 30 minutes with the first coat, this is where we are
so we scraped it all, added a 2nd coat, and started the chairs
UPDATE: 2nd coat is off, I scraped, washed and scrubbed with a toothbrush, then left outside to dry. I used some rough sandpaper folded in half to quickly clean out the deepest crevices, and now JR is headed out to get fine sand paper so i can quickly wipe it down before staining it :)
Tuesday, April 7, 2009
Rhino Hand Puppet - FREE PATTERN!
Here is pattern numero dos :) This is Ronny the Rhino. I think he's one of my sons favorites. Probably because he likes to say Rhinoceros... just because he can :)
Again, this pattern is extremely simple. It's great for a quick 1 hour project, a child who wants to help, or someone who is just dipping their toes into the sewing waters.
Download the pattern at BurdaStyle, and be sure to leave a review! Thanks!
Again, this pattern is extremely simple. It's great for a quick 1 hour project, a child who wants to help, or someone who is just dipping their toes into the sewing waters.
Download the pattern at BurdaStyle, and be sure to leave a review! Thanks!
Sunday, April 5, 2009
I'm not looking forward to today
Last night I got home around 1:15ish AM I guess from a wedding I shot with my partner. I was dead tired this morning, and slept in. I have a TON of sewing to do for our SM swap coming up, but I just want to be lazy today. Oh, and JR wants to start packing for our move to the new house. Eeek. Can't I have some down time?
Wednesday, April 1, 2009
They are sort of like new couches...
with the new house, we'd hoped to purchase new couches. You see, we are currently using a green/red/cream plaid set (not even a couch, a love seat and chair w/ ottoman) that was handed down to us when I was 2 months pregnant with our first child, and we had just moved halfway across the country with a trailer too stuffed to fit our couches into. They aren't pretty (mostly b/c our kids LOVE to spill drinks on them, the pattern is actually kind of cute/country-ish when it's not totally dirty), but they are functional and we are grateful to the family member who gifted them to us. We are just ready for something new.
A few months ago, Linens 'N' Things was going out of business, and we took advantage of that by buying some slipcovers at deep discounts. We got a loveseat, a chair and a recliner slipcover. We bought a recliner cover b/c they were lacking any ottoman covers, and I knew I could dismantle it and create a ottoman slipcover.
We put the slipcovers on the couch/chair and I instantly hated them. The color is fine. It's VERY neutral. It needs some fun pillows/throws to liven it up, that's for sure. But I HATE them b/c they are one-piece and therefore everytime you stand up, the elastic pops out. So I banished the covers off to a closet, along with the partially dismantled recliner cover, presumably to never come out again.
But with the new house comes new expenses. $330 for inspection. $500 for earnest money. $425 for appraisal. $300 to replace the clothes washer that died this week. $250 to fix the problem on DHs car that popped up this week. It all happens at once, and it sure adds up. So we've opted to wait on the new furniture and instead make do with what we have.... dirty couches and slaughtered slipcovers. LOL.
Today my plan was to finish disassembling the recliner cover and create an ottoman cover. Tonight/Tomorrows game plan is to figure out how to rig the couch/chair slipcovers so they don't pop out. I'm thinking maybe polyresin snaps? Or possibly elastic straps that hook around the cushions? Who knows. I'm so tired at this point that I can't think straight. Post your suggestions in the comments if you have any.
And in the meantime, isn't this one hell of a slipcover? Thank you. Thankyouverymuch.
A busy girl and a pretty dress
Things have been so crazy around here that my crafting time has been painfully limited.
We are buying a house! YAY! So you'll see a lot more home-oriented sewing going on in the future. I plan on doing throw pillows, drapes, and altering the slipcovers that we have for our couches that I hate.
Oh, and placemats. I have big plans for our placemats. LOL
In the meantime, though, I ran to JA the other day to pick up some fabric. I'd purchased a portabello pixie pattern, as well as the Miss Lily pattern
The directions are pretty good. I was confused at first reading how to do the skirt, but figured it out a few minutes later. It was really simple, and I was just over thinking it. Also, the maker of these patterns is fabulous and will answer any questions you have (no matter how stupid) very quickly. Lets just say I'm a bonehead, and that'll suffice as an explanation regarding how I know these things. LOL
So at JA, I bought some fabric for the PBP pattern (which i ended up just using for another Miss Madeline by the same maker of the Miss Lily) as well as fabric to make 2 Miss Lily dresses. One is done so far and I LOVE LOVE LOVE it. It's easily my favorite dress I've ever made. Lily loves it as well. You can tell by the way she twirls around and giggles as the skirt fans out. :)
So without further ado, here is Lily's new favorite dress ;)
Subscribe to:
Posts (Atom)